Right Hand Arpeggios
In this article we’ll look at right-hand arpeggios. Now that you have learned the right hand position for the classical guitar, lets put it to use.
To start off with, lets set up our fingers into the default position with the p on the 4th string (D), i on the 3rd string (G), m on the 2nd string (B), and a on the 1st string (E).
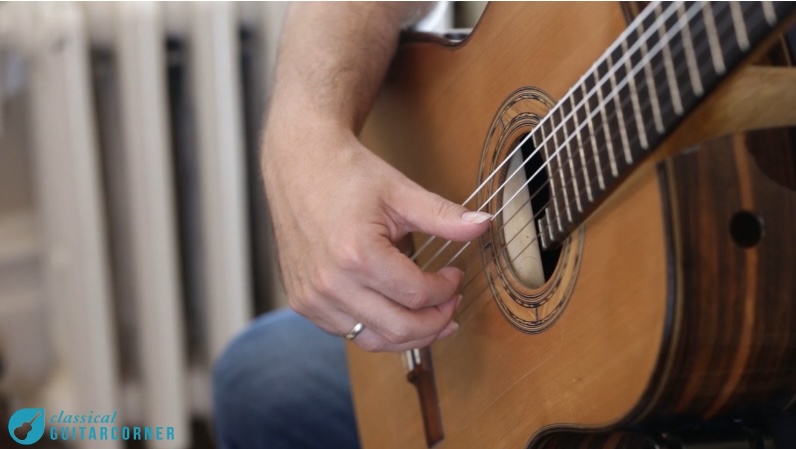
Without doing anything with the left hand we are going to play an arpeggio on the open strings. With your right hand in place, release your thumb and fingers in this order:
p – i – m – a
As you play each string let it ring so after you have played all four strings you can hear them all sounding at the same time.
Arpeggio
The four notes sounding after you have played the strings form a chord (which is and E minor 7th chord if you happen to be interested) which you arpeggiated. Instead of playing the notes of the chord all at the same time, an arpeggio breaks up the chord so that the notes appear in sequence. It doesn’t matter what sequence the notes appear in, it is still an arpeggio if you break the chord up note by note.
Two Arpeggios in a row
To play two arpeggios in a row, you are going to need to reset the hand and prepare the fingers to play again. To do this, place the fingers and thumb back in the default position all at the same time. If you don’t replace all of the fingers at the same time then some notes will still sound while some are silenced and it will sound a bit messy. Replacing the fingers serves two purposes; it both silences the strings and prepares the fingers to play once more. Both actions will become a big part of your playing. For instance, in a technique called ‘bass stopping’ you will place your thumb on a string only to silence it but not to play it. And, in a technique called ‘preparation’ you will place fingers on the string before it needs to be played so that it is fast and accurate.
Lets try two arpeggios in a row, with right hand preparation in between each arpeggio.
- Play p – i – m – a from the default position
- Replace all the fingers and the thumb on their strings in the default position, silencing the notes
- Starting once again from the prepared default position play p – i – m – a
Flowing arpeggios
These three steps (or really just the first two in alternation) allow a constant stream of notes to form a flowing arpeggio, which is a common technique in classical guitar music. Don’t worry if there is a bit of a pause when you prepare your left hand in step 2. Over time you will become faster and more fluid in this motion.
In right hand arpeggios 1 for the classical guitar, we looked at playing an arpeggio going from low to high strings with the right hand fingering
p – i – m – a.
Playing the arpeggio in reverse – a – m – i – p requires some different movements and is often a little more challenging for the beginner. With the p – i – m – a arpeggio, we could prepare our hand by replacing all fingers and the thumb on their repective strings to play the arpeggio. However, when playing a – m – I – p the fingers don’t get a chance to prepare on the string they are about to play making the accuracy and speed of the arpeggio that little bit more challenging.
Right-Hand Preparation
Right-hand preparation offers stability, accuracy and certain articulation possibilities on the classical guitar. Some might argue that it is one of two main paths to go down in terms of right hand free stroke technique, but personally I think you can have the both of best worlds if you want.
The concept of right hand preparation is quite simple: to prepare a finger to play a string by placing the finger on the string in readiness before the string is played. It results in more security and accuracy than without any preparation, however, by placing the finger on the string in readiness you will silence any note that may have been ringing on that string. This could be either desirable or undesirable, depending on the musical situation.
How to do it:
To demonstrate this, place your right hand in the default position and play the following arpeggio on open strings:
p – m – i – a
Simple enough.
Let’s play it again and this time we will play the string while preparing the next finger on another strings. For instance, as we play the thumb stroke on the 4th string, we will be placing the m finger on the second string. Once we play the m finger on the second string, we will place the I finger on the 3rd string, and so on…
Finger independence
Right hand preparation requires some finger independence, just as the left hand will need for much of its work.
The goal is for the preparation to happen smoothly and in quick synchronization with the other fingers. While you may feel a little chunky and clumsy moving your fingers around now, with time these movements become smoother and more efficient giving you stability and control while reducing the amount of time actually spent prepared on the string. In fact, good right hand preparation might not look like preparation at all!
The example of the arpeggio we just played is also a great way to train the right hand to stay close to the strings and in position. However, you will find that in a piece of music preparing your right hand fingers is not going to happen on every note and in fact you might just save it for some very particular moments when you want to control the tone of a particular note, or stabilize the hand.
For instance if you had two very gentle notes, right at the beginning of a piece that you wanted to control, you could prepare your right hand fingers to play those two notes to execute them with accuracy. Similarly if there was a particular note out of a series of notes that you wanted to accentuate you might prepare that right hand finger well before it is needed.