CAGED System on Guitar
In this article we’ll introduce you to the CAGED system on guitar.
The guitar fretboard is hard to decipher. It seems to have little rhyme or reason to where the notes are placed and therefore learning the notes (and the alternate places to play the same notes) can be a long process with a steep learning curve. Before you get too excited, know that there is no golden key to understanding the guitar fingerboard. There are, however, several ways to understand it so it becomes more manageable.
The Fingerboard Maze
To start off with, let’s have alook at why the guitar fingerboard is such a maze to start off with:
The Fingerboard in 4ths
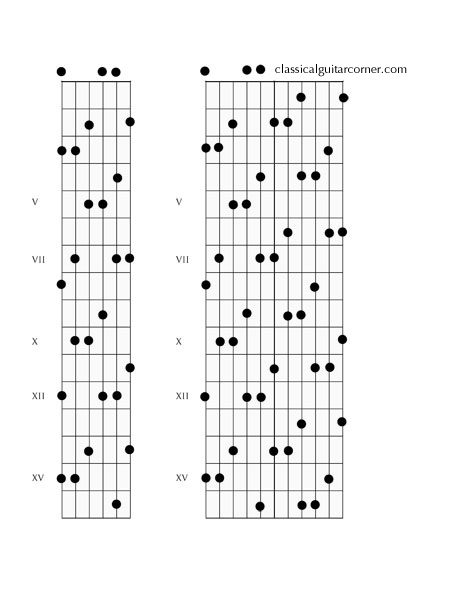
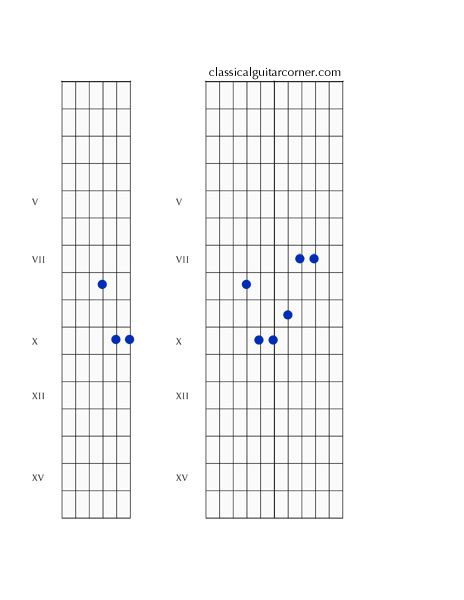
1. This is an imaginary fingerboard. You don’t have to study it, just have a quick look. On the left, we have a six string fingerboard that is tuned in 4ths. The dots you see are all the notes that are in a C Major chord, that is to say, C E & G. If you look you will see that the layout of these notes is quite regular and there are patterns that start to go diagonally across the fingerboard. On the right of figure 1, I have drawn a fingerboard that extends out to many strings, but still tuned in 4ths. This way you can start to see that the patterns repeat as you go up the fretboard.
Six-String Major Chord
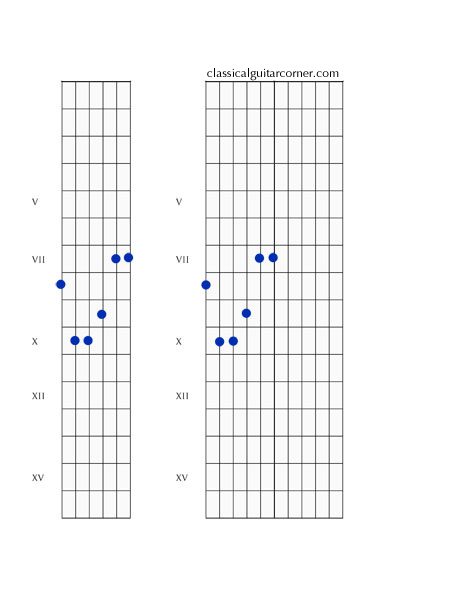
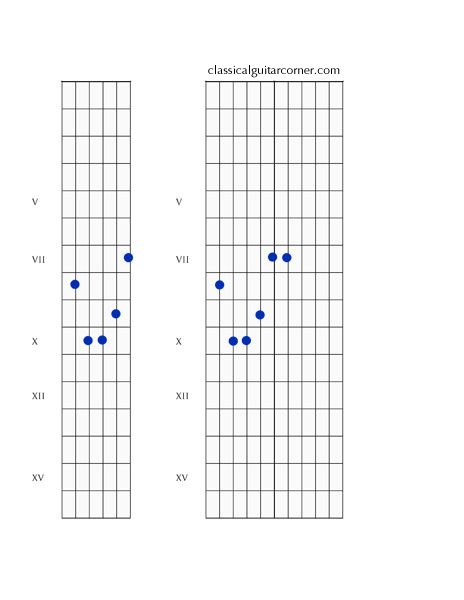
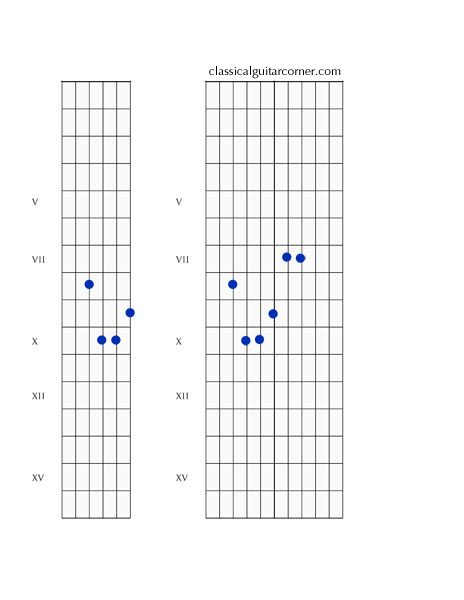
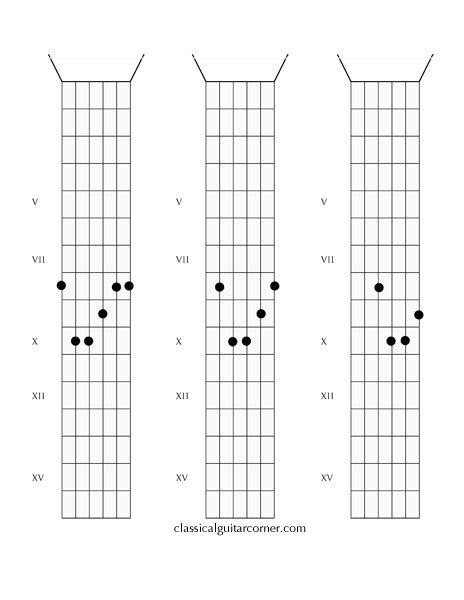
2. In Figure 2 we have taken this imaginary fretboard and placed a six string major chord shape on it. As you can see, because of the first and second string, this chord is pretty impossible to play. The barre that we would normally use to go across the fret doesn’t work. However, in Figures 3, 4 and 5 you will see that if we had this tuning of 4ths, we could shift this shape across the strings and still maintain the same chord voicing! Much like we can shift a shape up and down the fretboard and maintain a chord (a diminished chord for example) in this 4ths fretboard we could potentially shift the shape across the strings too making the shape very regular.
In figure 6 you have a summary of what these imaginary chords would look like going across the fretboard. Very simple, just maintain the same arrangement of fingers, and you will get the same chord voicing!
BUT!
How Tuning affects shapes
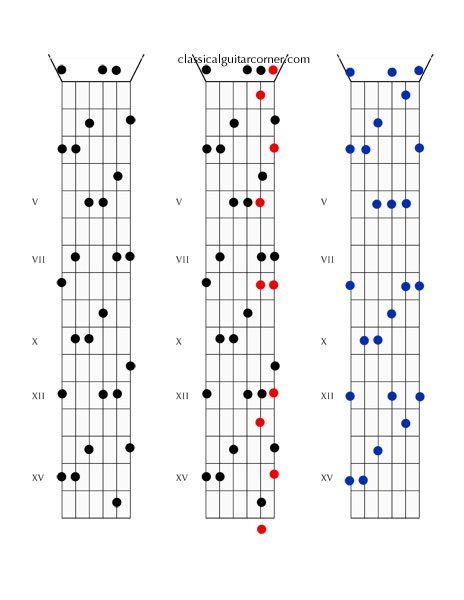
Unfortunately, because of that impossible 6 string shape, we have a tuning that is not all in fourths. There is one string that we tune with the interval of a third and that is the 2nd string. The note B is a third away from G (the third string) and this B send the fretboard into all sorts of irregular patterns. Figure 7 has our imaginary fingerboard on the left, in the middle all of the red dots show you the notes that move around because of that third tuning of the second string, and on the left we see the same C major triad as it appears on our “real” fingerboard of the guitar.
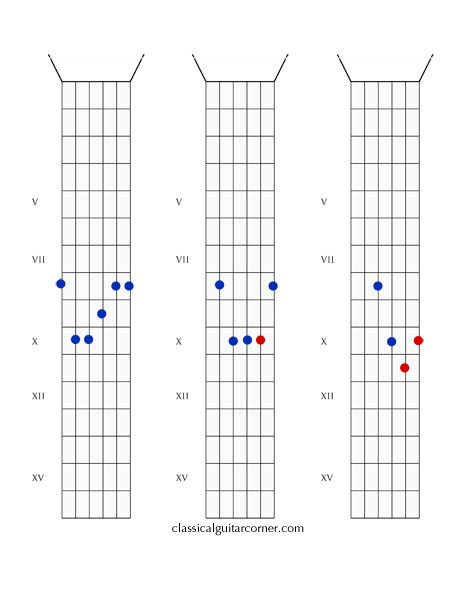
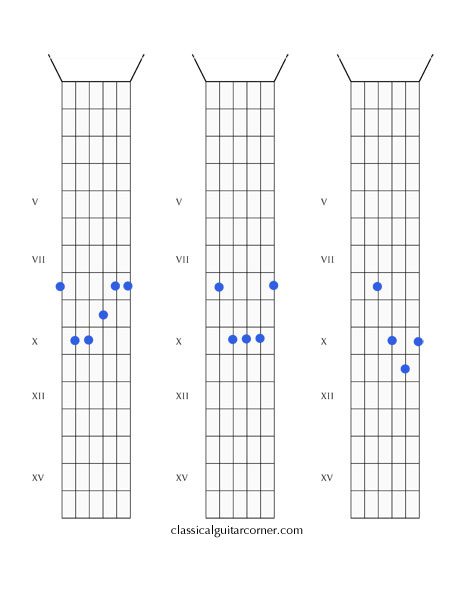
Figure 8 Takes that same six string shape and moves it across the strings as before. But, now that the tuning is different we cannot simply move the shape across, rather some notes need to be moved to compensate for the tuning. So, we get the three shapes as seen in figure 8. They all have an open fifth between the lowest two notes.
CAGED: E Major, A Major, and D Major Shapes
Figure 9 shows these three chord voicings as we use them on the standard guitar. You may look at these shapes and recognize them from playing. The left is the E major shape, the middle is the A major shape and the right is the D major shape.
CAGED: C Major and G Major Shapes
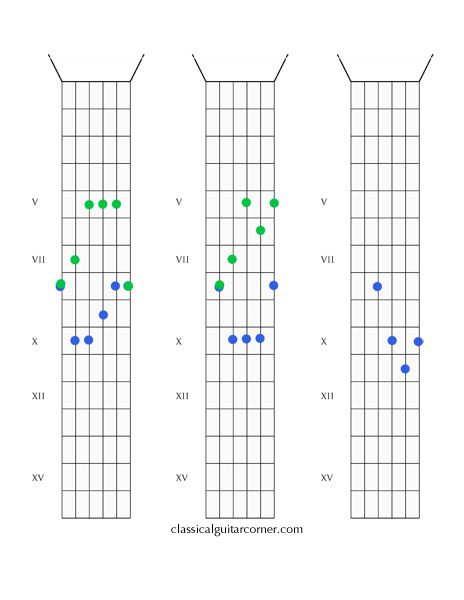
Now, as I stated before, these three shapes have an open fifth between the lowest two notes. This means that, in root position (with the C as the lowest note in this case) there is another voicing possible with an interval of a third in the lower two voices. These voicings are written in green in figure 10. Have a look and see if you can identify them as C major and G major shapes.
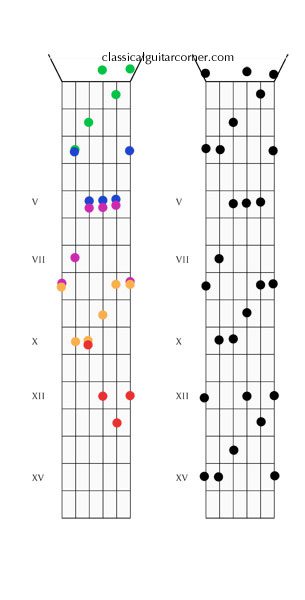
Figure 11 is an important one to study. It shows that these five major chord shapes interlink and span the twelve frets of the fingerboard (and then proceed to repeat). The usefulness of this knowledge allows us to see the fingerboard not in individual notes but as five units that act as pillars for us to understand the arrangement of the fingerboard. You will also see that the order of these interlinking shapes is actually spelled out by the word CAGED. The C shape connects to the A shape, connects to the G then E then D shape. Playing all of these shapes one after another will have the same chord (C major in this instance) but with different voicings that cover the fretboard.
CAGED System on Guitar: Conclusion
These examples all used the chord of C Major (with the notes C, E, and G) but the principle applies to any major chord. The CAGED system can be applied to both chords and scales (in fact I built my entire scale book around the CAGED system) and the principle can be used on any type of chord (minor, seventh etc.) however they do not link up as neatly as the major chords.


This is a very clear and succinct verbal and graphical explanation of why we have that pesky 2nd string at B, an interval of a third from G rather than another 4th interval. This is even more apparent when one knows that from early guitar playing history the guitar was mainly played as chordal accompaniment or at least that is the apocryphal tale, and with the 3rd/B 2nd string, chords up and down the neck facilitated the main objective.
Perhaps iff there had been early emphasis on melody perhaps the all 4ths would have been the norm for tuning. As was pointed out, some thoughtful “slanting” allows chord forms to be playable that at first glance are essentially impossible. It was probably a path of least resistance thing, given the early use of the guitar. Of course these days players use a wide variety of alternate tunings, especially on steel string guitars but also on nylon string guitars.
Again this is also a succinct and clear presentation of the basics of the CAGED movable chord forms.
Perhaps the follow-on article will go over and compare the chord forms for major and minor chord forms… even more? :-)