Classical guitar fingernails are a constant source of curiosity. Perhaps the most common question classical guitarists get asked is, “Can you show me your nails?” It’s an interesting thing because the physical attributes of one’s fingernails – length, shape, texture – can have such a big impact on the sound. Andrés Segovia many years ago said that some are fortunate enough to be born with nails that are ideal for the classical guitar while others are not:
The difficulty of course is to be born with a very good quality of nails. First quality: having strong nails, not easy to break. Second quality: to have, and at the same time, soft nails for the quality of the tone. And without a beautiful sonority, the charm of the guitar disappears absolutely.
Nails are unique
And this is an important point to make as we begin this discussion about nails on the classical guitar: just as everyone has a fingerprint that is unique and identifiable, each person’s nails are also unique. This means there is more variability in the sound that is or can be produced (even on the same instrument) from person to person than on other instruments.
Yes, one’s technical approach to weight in the fingers, hand, wrist, and arm all have a big impact on the sound one makes on the piano. The amount of rosin one uses on a bow and how the bow is held and used have a big effect on sound on the violin. And a saxophonist’s embouchure very much shapes the overall sound one makes.
However, I would argue that the classical guitar has a much wider variability from player to player because of the physical factor of fingernails. When you add to that variability the different approaches each person may take technically, you really have a situation where each person will make almost a completely different sound.
Thus, nails are part of what makes classical guitar such a difficult instrument to master.
Quality of fingernails
If your nails are brittle and prone to break, there are a few possible solutions to consider. First, you may seek out natural solutions (such as diet and moisture) or even nail hardeners to strengthen your nails over time. This is more of a long-term solution that will require not only time but consultation with a dermatologist or physician.
Secondly, you may consider using fake nails. Many professional guitarists use one or more fake nails (some using all fake nails) and have a great sound. A great kit that uses a non-toxic and glueless adhesive is the Italian “Guitar Nails Kit.”
Hooked fingernails
While some may have fairly thick nails that don’t easily break, there may be other problems with nails that can develop. One common nail problem is nails that hook. Many people have nails that hook in the middle of the nail, which can cause the nail to catch on the string. Guitarists have created several solutions (all temporary) for this problem.
One solution for this is to file directly underneath the nail until the nail “flattens out” on the nail file. This approach takes off a lot of nail and thus many who use this approach will be left with very short nails (which sometimes is not ideal). Moreover, when the nails grow back the hooks will also grow back, so this is only a temporary solution.
Another much more alternative solution championed by David Russell is to heat up a spoon with a lighter or over the stove and then place the hot spoon (carefully!) underneath the nail long enough for the nail to conform to the spoon’s shape. Again, the hooks will develop again over time so this is only a temporary solution. And obviously the potential for burning one’s fingertips is high with this solution as well! If you’d like to try this out and prevent burning, place a second spoon vertically under the nail and up against the flesh of the fingertip so you can get the hot spoon under the nail without touching the flesh of your finger.
Ridges
Another common problem with fingernails is lengthwise ridges. Usually a result of diet and other physical factors, ridges can cause an uneven texture on the underside of the nail. The above first solution for hooked nails (filing directly underneath the nail until the ridge is evened out) works in most cases, but is again only a temporary solution. One must be wary not to take off too much nail.
Another solution is to speak with your dermatologist or physician about dietary changes to produce healthier nails. A change in diet can often have a big impact on the health (and yes also the sound!) of your nails.
Classical Guitar Fingernail Length
For both length and shape of nails it is important to experiment. Start with a longer nail and gradually work toward a shorter nail bit by bit over time to see what works for you. Remember you can quickly and easily take off nail, but it takes time for nail to grow back.
When determining your nail length, turn your right hand with your palm facing you and look at how much nail you can see above the fingertip. A good starting place is a few millimeters above the fingertip. (Again, you can always go shorter from there.)
Long vs. Short Nails
Some things to keep in mind about nail length (these are rough generalizations, not rules):
- Free strokes may sound and feel better with longer nails, but rest strokes may be more difficult. A balance that allows you to move freely and easily between free and rest stroke while still maintaining a good sound with each is ideal.
- Longer nails can require more controlled, efficient motions in the fingers to prevent excess nail noise.
- It can sometimes be difficult to produce a lot of volume out of the instrument with shorter nails.
- Nail length (like nail shape) and right-hand attack are interdependent and so it’s important to consider the height of the wrist, the point of contact on the strings, and more when experimenting with nail length (and shape). More on these technical elements below.
Classical Guitar Fingernail Shape
While nail shapes can be highly variable, there are some general guidelines to keep in mind. There are three common types of nail shape: rounded, ramped, and square.
Rounded Shape
Andres Segovia (and Christopher Parkening in his method) recommend a rounded shape. This shape naturally follows the shape of one’s own fingertips.

Ramped Shape
Scott Tennant in his book Pumping Nylon recommends a ramped shape. The ramp will be shorter on one edge of the nail, at the point of contact, and gradually gets longer toward the other edge of the nail. (Take note that sometimes the “point of contact” is on the right side of the nail and so you will see some with a so-called “reverse ramp.”)
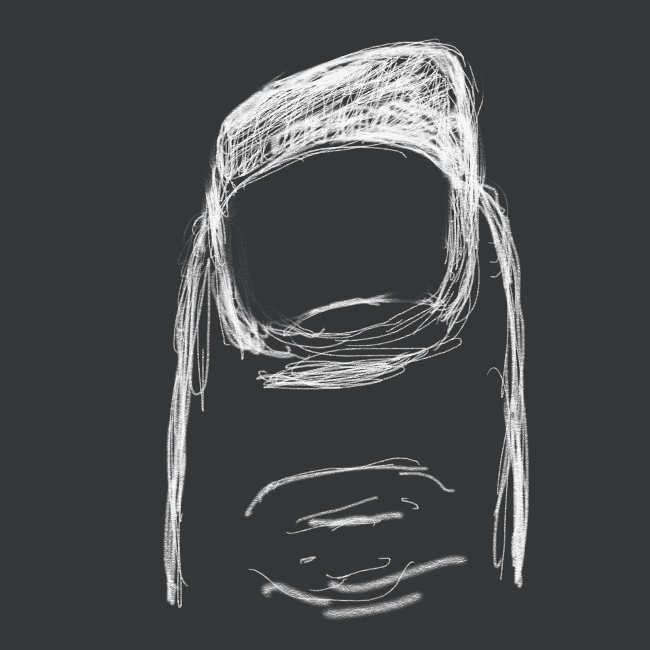
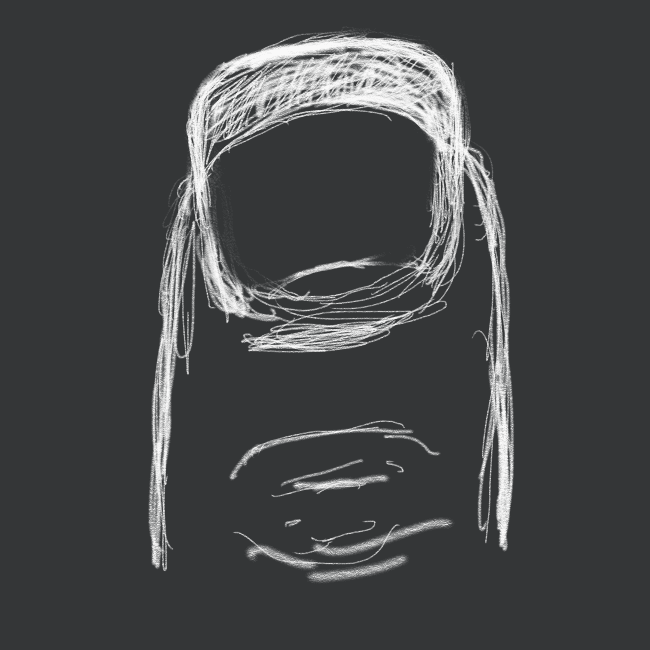
Square Shape
Another common nail type is the square shape. This follows a straighter line and though “square” implies sharp 90-degree angles, the edges/corners of the nails are usually rounded off with this shape.
Shapes to avoid
We generally want to avoid nail shapes with sharp angles. So a ramp that only goes to the middle of the nail will produce a sharp point at the center of the nail (resembling a plectrum/pick). This produces a rather harsh and thin tone. Likewise, if we don’t round off corners at the edges of the nails and have sharp 90-degree angles the string can get caught, again producing a poor sound.

Nail with a sharp point
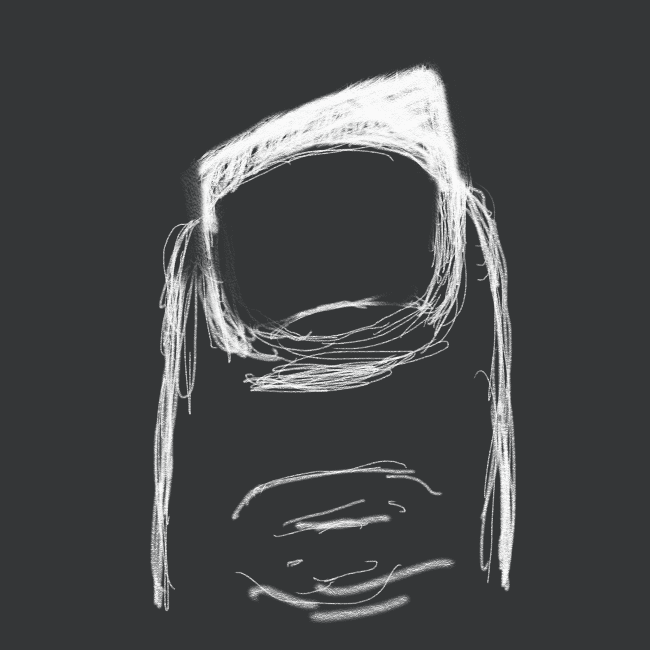
Nail with sharp corners
How to find a shape that works for you
Here’s a great way to find a shape that works for you:
- Take a piece of light sandpaper (something that won’t take off too much nail, like 500-grit or higher) and wrap it around the third string near the sound hole at your playing position for your right hand.
- Hold the paper in place with your left hand and then begin to play as you normally would with your i finger.
- Do this repeatedly and keep checking the underside of the nail. After a few repetitions you’ll begin to see a white outline of where the nail is making contact with the string.
- Then you can simply take your nail file and file along the line the sandpaper has formed on your nail.
- Repeat with the other fingers, moving the paper to other strings when necessary.
Here’s a great tutorial and demonstration by French guitarist Thomas Viloteau:
How to File and Buff Your Nails
Because everyone’s nails are different and we’ll all settle on different shapes and lengths of nails, how you file your nails is something that will also be rather personal. Nonetheless, here are some principles to follow.
Filing Nails
Begin filing with a file that has enough grit to take off nail, but not so rough that it takes off too much nail. Remember: you can always take off more nail quickly and easily, but growing your nail back takes much longer.
- A good starting place is to turn your hand so your palm is facing you, then curl your fingers toward you so you can see the front edge of your nails.
- Take your file in your left hand, holding it at roughly a 45-degree angle to the nail and begin to outline the shape you want. Work slowly and be consistent with creating the shape you want.
- Especially if you’re filing in a straight line (the more ramped or square shapes) you’ll end up with sharp angles at the corners or far edges of the nails. You’ll want to round off these corners so the nail doesn’t catch on the string.
Be cautious of filing down too much. Sometimes it’s not always clear how much nail you’ve removed until you begin the buffing process.
Buffing Nails
Often overlooked in discussions about nails, the texture of the nail makes up a HUGE proportion of the sound. If you have the perfect length and shape of nail, but a rough texture where the nail makes contact with the string, you’ll still get a less-than-perfect sound. Smoothing out the surface of the nails can often be one of the biggest factors in changing the sound we make with our nails.
We always want a glassy smooth surface with our nails, especially in that region of the nail that makes contact with the string. To achieve this, after we have filed our nails to the correct length and shape, we must polish or buff the nails.
The buffing process can be as simple as using a 500-grit sandpaper to the nail to smooth out all rough edges, or it can be much more intricate, involving multiple grits of sandpaper down to very fine micromesh (almost leather in texture and consistency). Different methods work well for different people, so once again experiment! The real key to the buffing process is to check the nail periodically to make sure you’ve removed all rough parts along the surface of the nail, especially the underside of the nail where the nail makes contact with the string.
If you buff your thumbnail first, you can use the smooth surface of the thumbnail to check the surface of each nail as you buff them. If you feel any rough edges, you need to continue buffing. (Tip: make sure your thumbnail is smooth first as every nail will feel rough if your thumbnail has a rough spot!)
Is the Thumb different?
The thumbnail attacks the string from a different angle than the fingers and so it may need to take a different shape (and length) than the fingers as well. Many who use a rounded shape for the fingers will prefer a ramp for the thumbnail. Some also prefer a reversed ramp on the thumbnail. Again, experimentation is the name of the game here. Start with a longer nail so you can see what that feels and sounds like, then go gradually shorter until you find what works and sounds right to you.
Equipment
Essentially you need two tools for nail filing and buffing: a file to remove nail; and something to buff the nail. That’s it. You can of course get more nuanced with what you use, however.
Nail Files
A increasingly popular tool for filing or removing nail is the glass nail file because is hard enough to take nail off, but it still leaves the surface of the nail relatively soft. Alternatives include the diamond metal file or any other coarse file.
Buffing paper
There are two kinds of buffing paper you can get: sandpaper (in fine grades all the way down to micromesh) and buffing pads.
Buffing pads have buffing paper on either side with a foam center. The foam center of the buffing pads provides a nice cushion for buffing. And the sandpaper is a bit more pliable and so you can fold it and easily get to parts of the nail that may be more difficult with the buffing pads.
Micromesh is somewhat in between these two: it is thick and so has a bit of cushion to it, but it is much, much finer than other sandpapers and a super fine grit (12,000) will feel like the texture of leather. Finishing the nail with micromesh leaves the nail with a glassy surface.
Nailcare and Nail Repair
Nailcare
The best way to care for your nails is the same way you care for the rest of your body: a healthy diet and frequent exercise. If your diet is low on iron, zinc, or magnesium, you can boost these by eating foods that contain these essential vitamins. Beyond that you may consult your physician about potential supplements. A popular one that many guitarists use is Biotin. There are also a few other things to consider, however.
First, nails, like hair and skin, need moisture to thrive. If you live in a dry environment, or you need to use your hands in ways that often dries out your nails, you may want to consider moisturizing them. Antigoni Goni recommends soaking your right-hand nails in lukewarm olive oil at night (skip to 2:58) and then sealing them with a moisturizing cream or vaseline:
(There are many other wonderful tips regarding nails from Maestra Antigoni in the above video.)
Nail Repair
Nails are essential tools for the classical guitarist (unless you choose to play with flesh). But sometimes nails crack, split, and break. In these instances you have a few options, including fake nails, nail repair, or playing flesh until the nail grows back.
First, you should pursue repairing the split or cracked nail if possible and see if you can salvage the nail while it grows back out. A very simple, cost-effective way to repair a split or cracked nail is to use either tissue paper or a tea bag and nail glue. Carefully cut a small piece of the tissue or tea bag to fit over the split on every side. Next add nail glue directly on top of the tissue / tea bag and allow it to dry. You may need to gently file down the glue so that it is even with the nail. Repeat as often as needed to keep the nail secure. The nail will eventually grow back out past the split with time.
Second, if the split or crack is too bad to repair, you’ll need to clip off the whole tip of the nail and use a fake nail. You can use a whole acrylic nail, or just cut off the tip and fix it with nail glue. If you only use the tip, you can either use the acrylic under or on top of the nail.
Finally, a salon can make a gel nail that is hardened and cured with UV light. If you pursue this option you’ll want to find a salon that understands the right thickness for a classical guitarist. Yamandu Costa uses his own at-home gel process (in Portuguese, but with English closed captions):
Fingernails and Right-Hand Technique
While the length, shape, and texture of your nails will make a big impact on the sound you produce on classical guitar, how your finger (whether with or without nails) makes contact with the string will make an even bigger impact.
Point of Contact
The point of contact is the place where your nail and/or flesh first touch the string as you begin your stroke. The more consistent you are with the point of contact, the more consistent will be the sound you make on the instrument. So it’s important to spend some time experimenting with the point of contact. First, it’s important to note that several factors affect the point of contact.
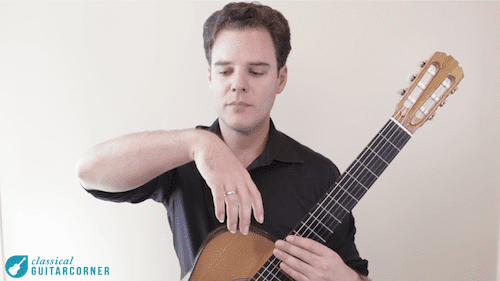
Arch of Wrist
If the wrist is too low—if it does not have enough arch—the tendency will be for the fingers to pull upward. This activates the string in such a way that mostly nail makes contact with the string (and usually the longest part of the nail) and this can result in a thin and even a harsh sound. To find a good arch for your right-hand wrist, hold your arm out straight in front of you and allow your wrist to be completely loose. The natural arch your wrist takes as it hangs will be almost perfect for your right-hand wrist position on the instrument. This works with rather than against the natural tendency of the body.
Finger motion and efficiency
Likewise, an inefficient finger motion, such as bicycling (where the finger makes a circular motion into the palm and back out), can make having a consistent point of contact more difficult. The farther the finger travels away from the string the farther it has to go to get back—and this can result in lack of accuracy.
A good point of contact will be at the place where nail and flesh meet. This allows a sound that has volume and projection from the nail but softness and warmth from the flesh. Even more important: once you find a point of contact that works for you (and for your nail shape and length), try to be as consistent as possible with that point of contact. This will improve accuracy as well as consistency in tone.
No Nails
Finally, consider (and try out!) playing without nails. While we are only focused here on the use of fingernails, there is a long, time-honored tradition of playing classical guitar without nails. A great no-nails player who studied closely with Andrés Segovia is Virginia Luque:
You can go here to learn much more about playing classical guitar without nails.
Left-Hand Nails!
P.S. While most discussion about fingernails and classical guitar covers the right hand, many forget to talk about left-hand nails. If your left-hand nails are too long they can affect the placement of your fingers on the frets and even slightly affect the left-hand position. And just like the right-hand nails, your left-hand nails will need frequent maintenance.
There are two primary ways to trim your left-hand nails to keep them nice and short: fingernail clippers; or a rough nail file. Using clippers is the quickest and easiest way to get your nails short. But I have taken to using a nail file to reduce the length of my left-hand nails. This allows me to give a little shape to the nails so they conform to the way I want my fingers to be placed on the fretboard. Thus I create a very slight ramp (in opposite directions) with the 1 and 4 fingers but square off the 2 and 3 fingers. Either way, keeping your left-hand nails short will ensure good finger placement in the left hand.
Can you show me your nails?
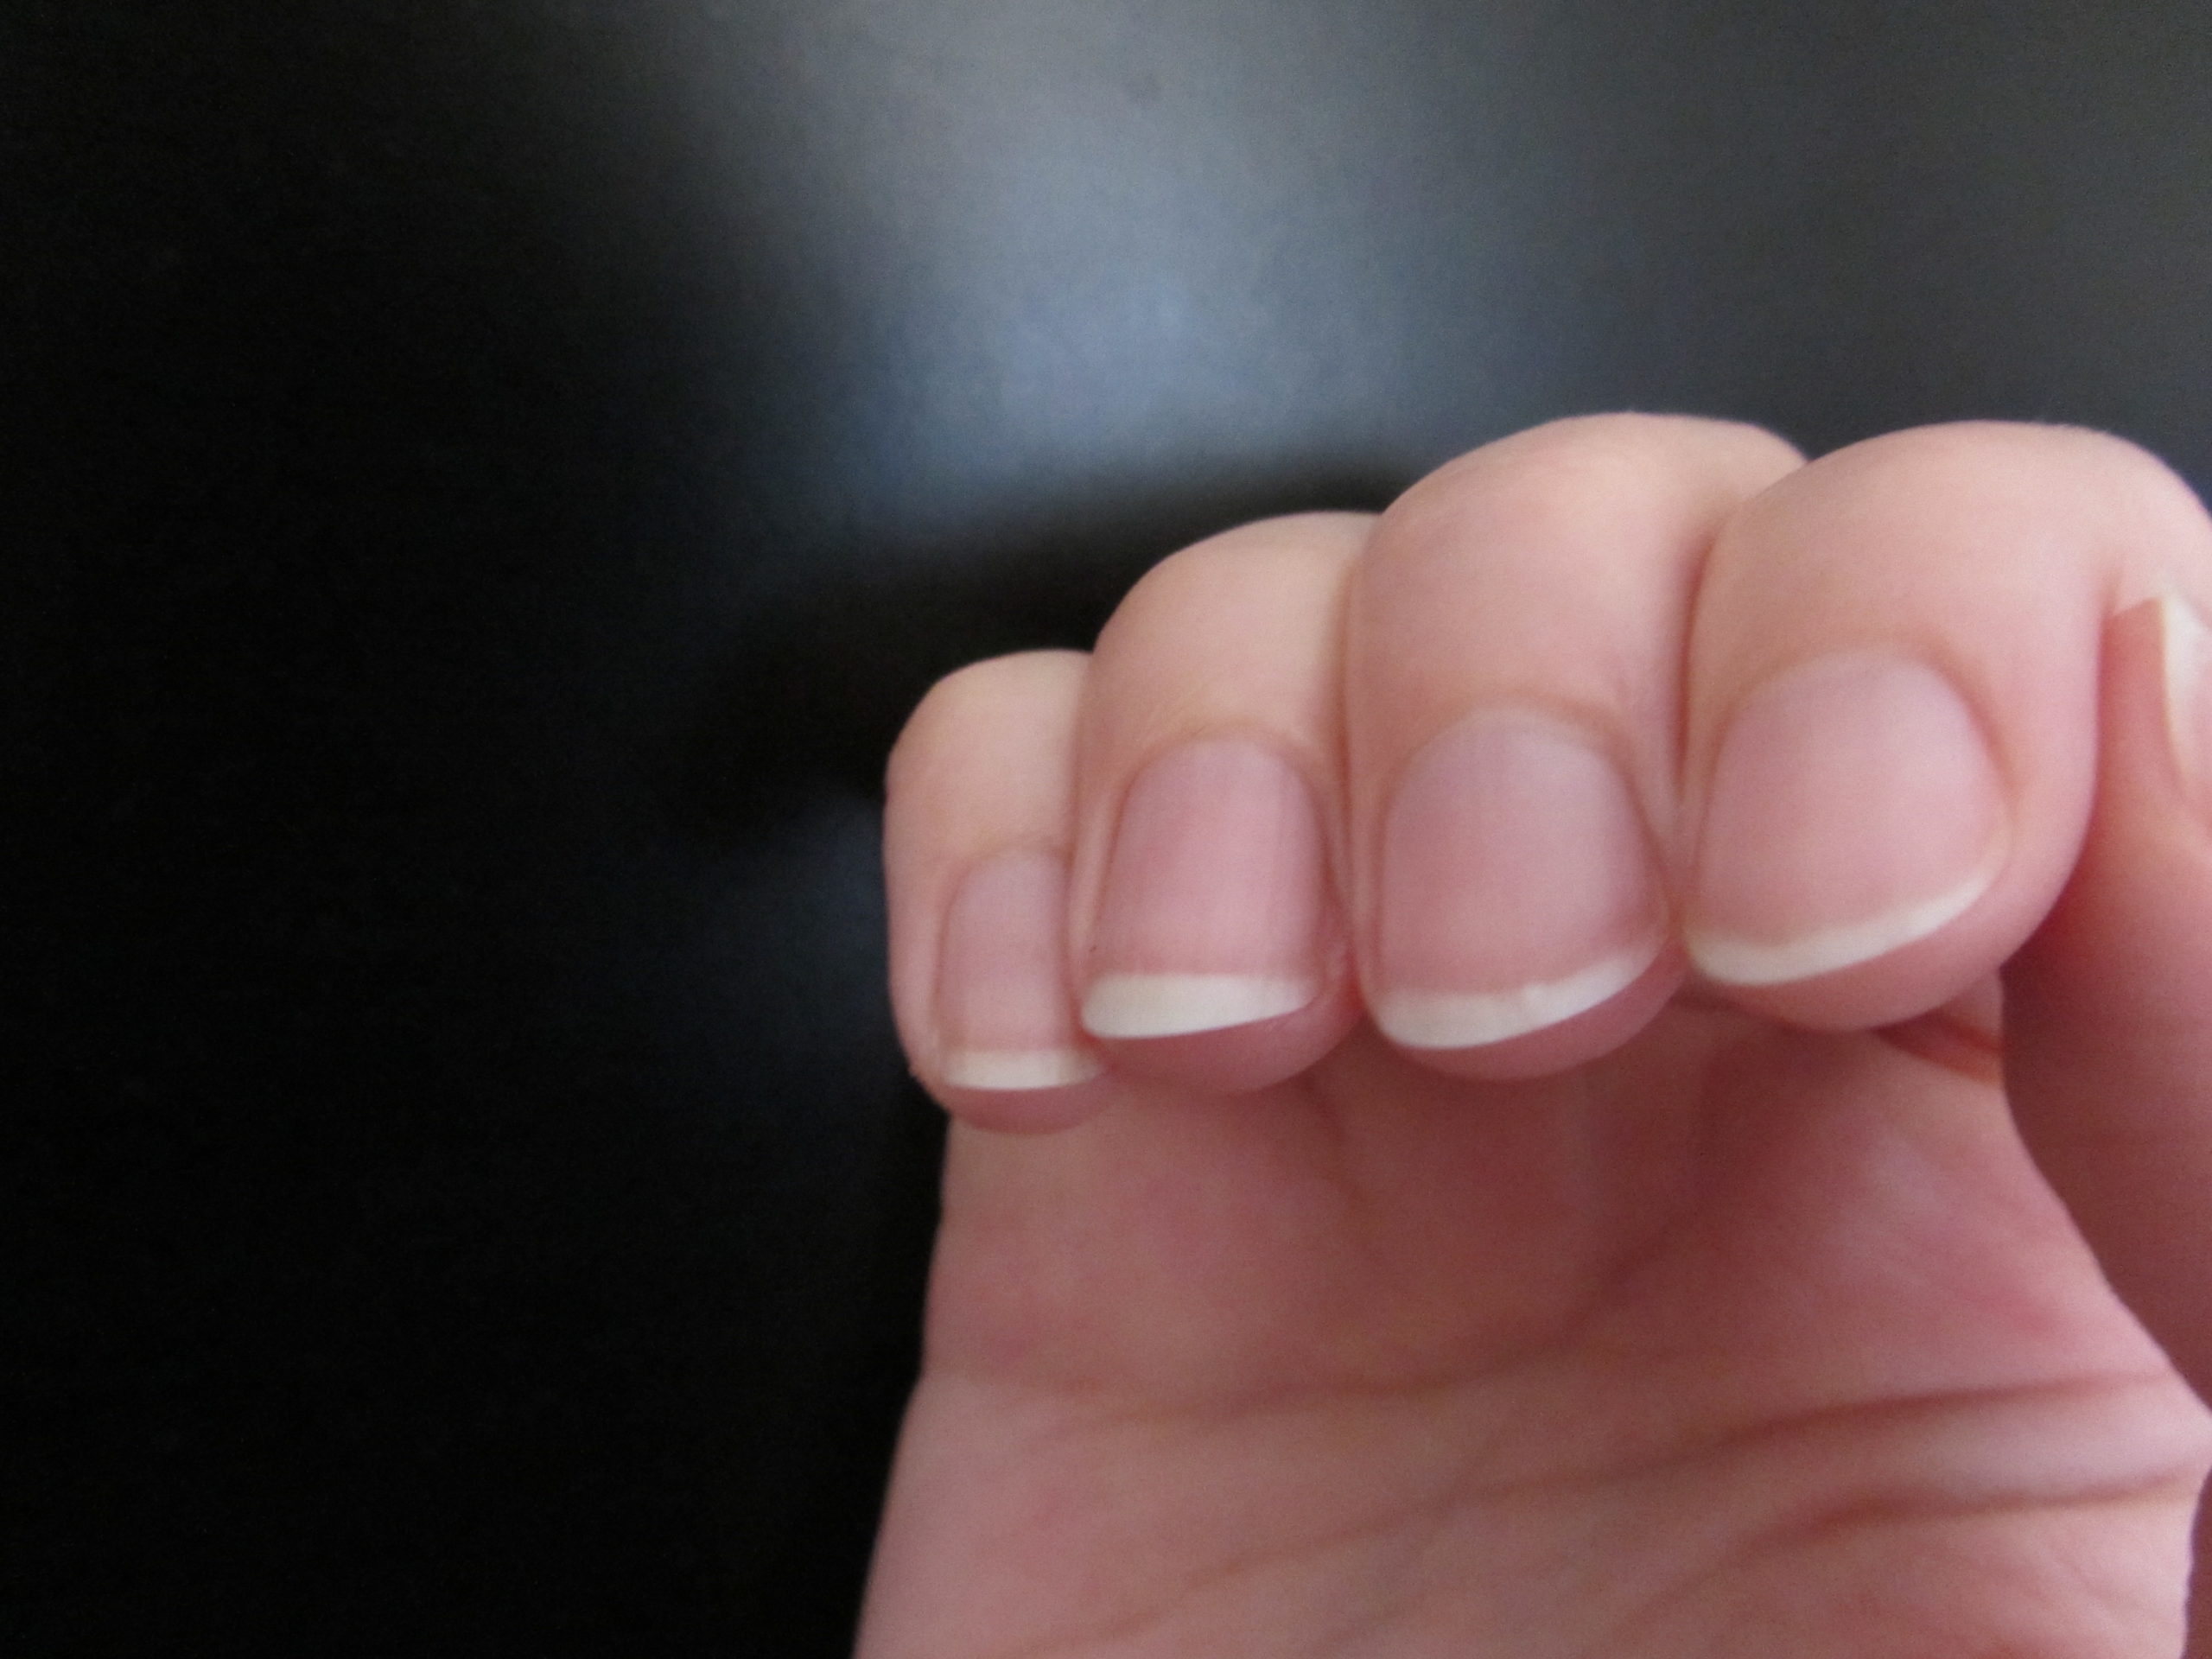
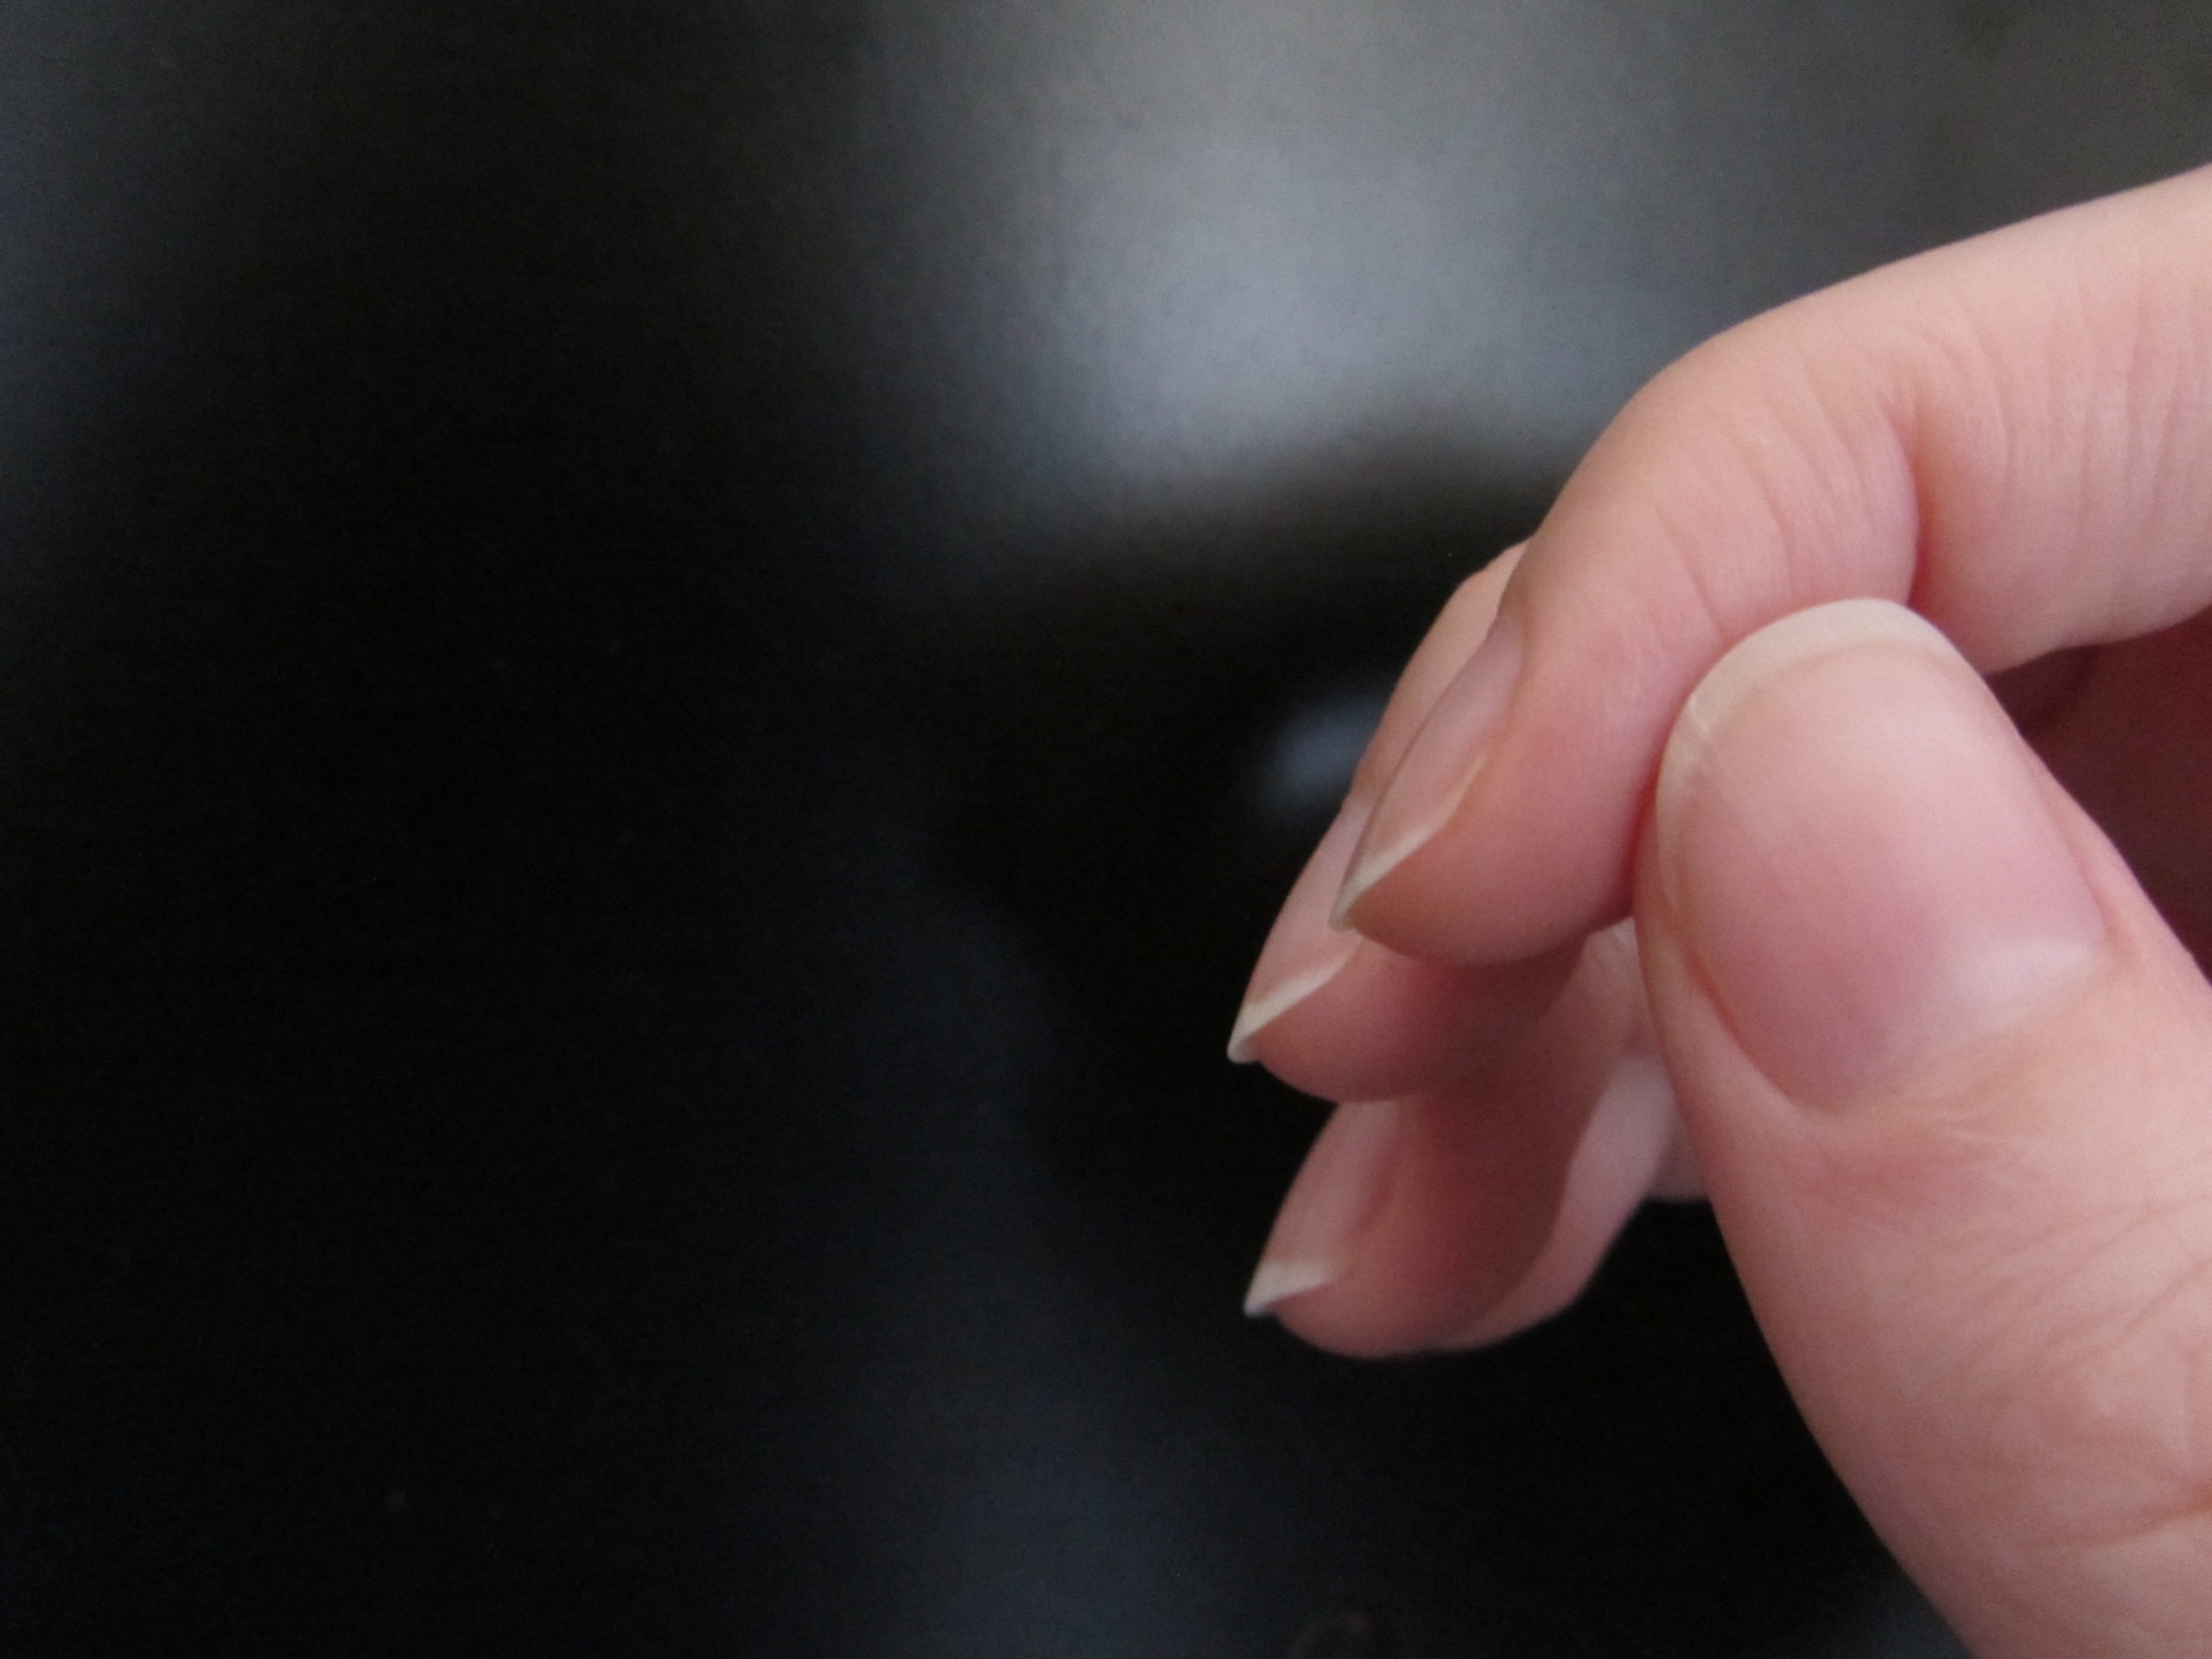
Yes, this is one of the most common questions we get at CGC, so here are some photos of some of our favorite professional classical guitarist’s nails!
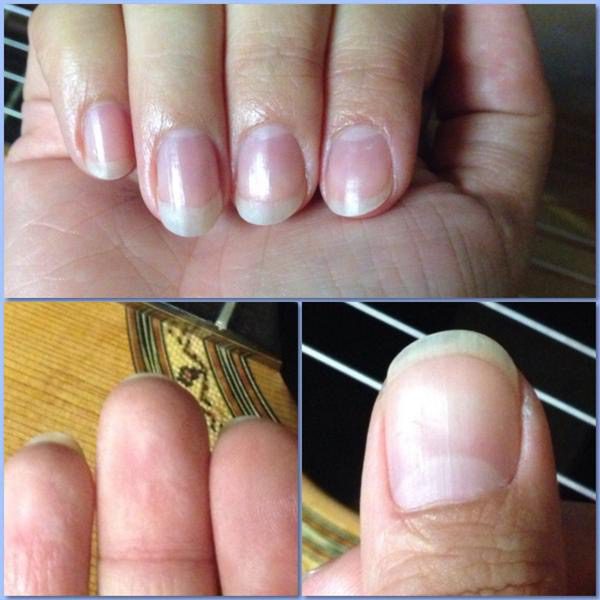
Gohar Vardanyan’s Nails
Check out Gohar’s YouTube Channel and Instagram!
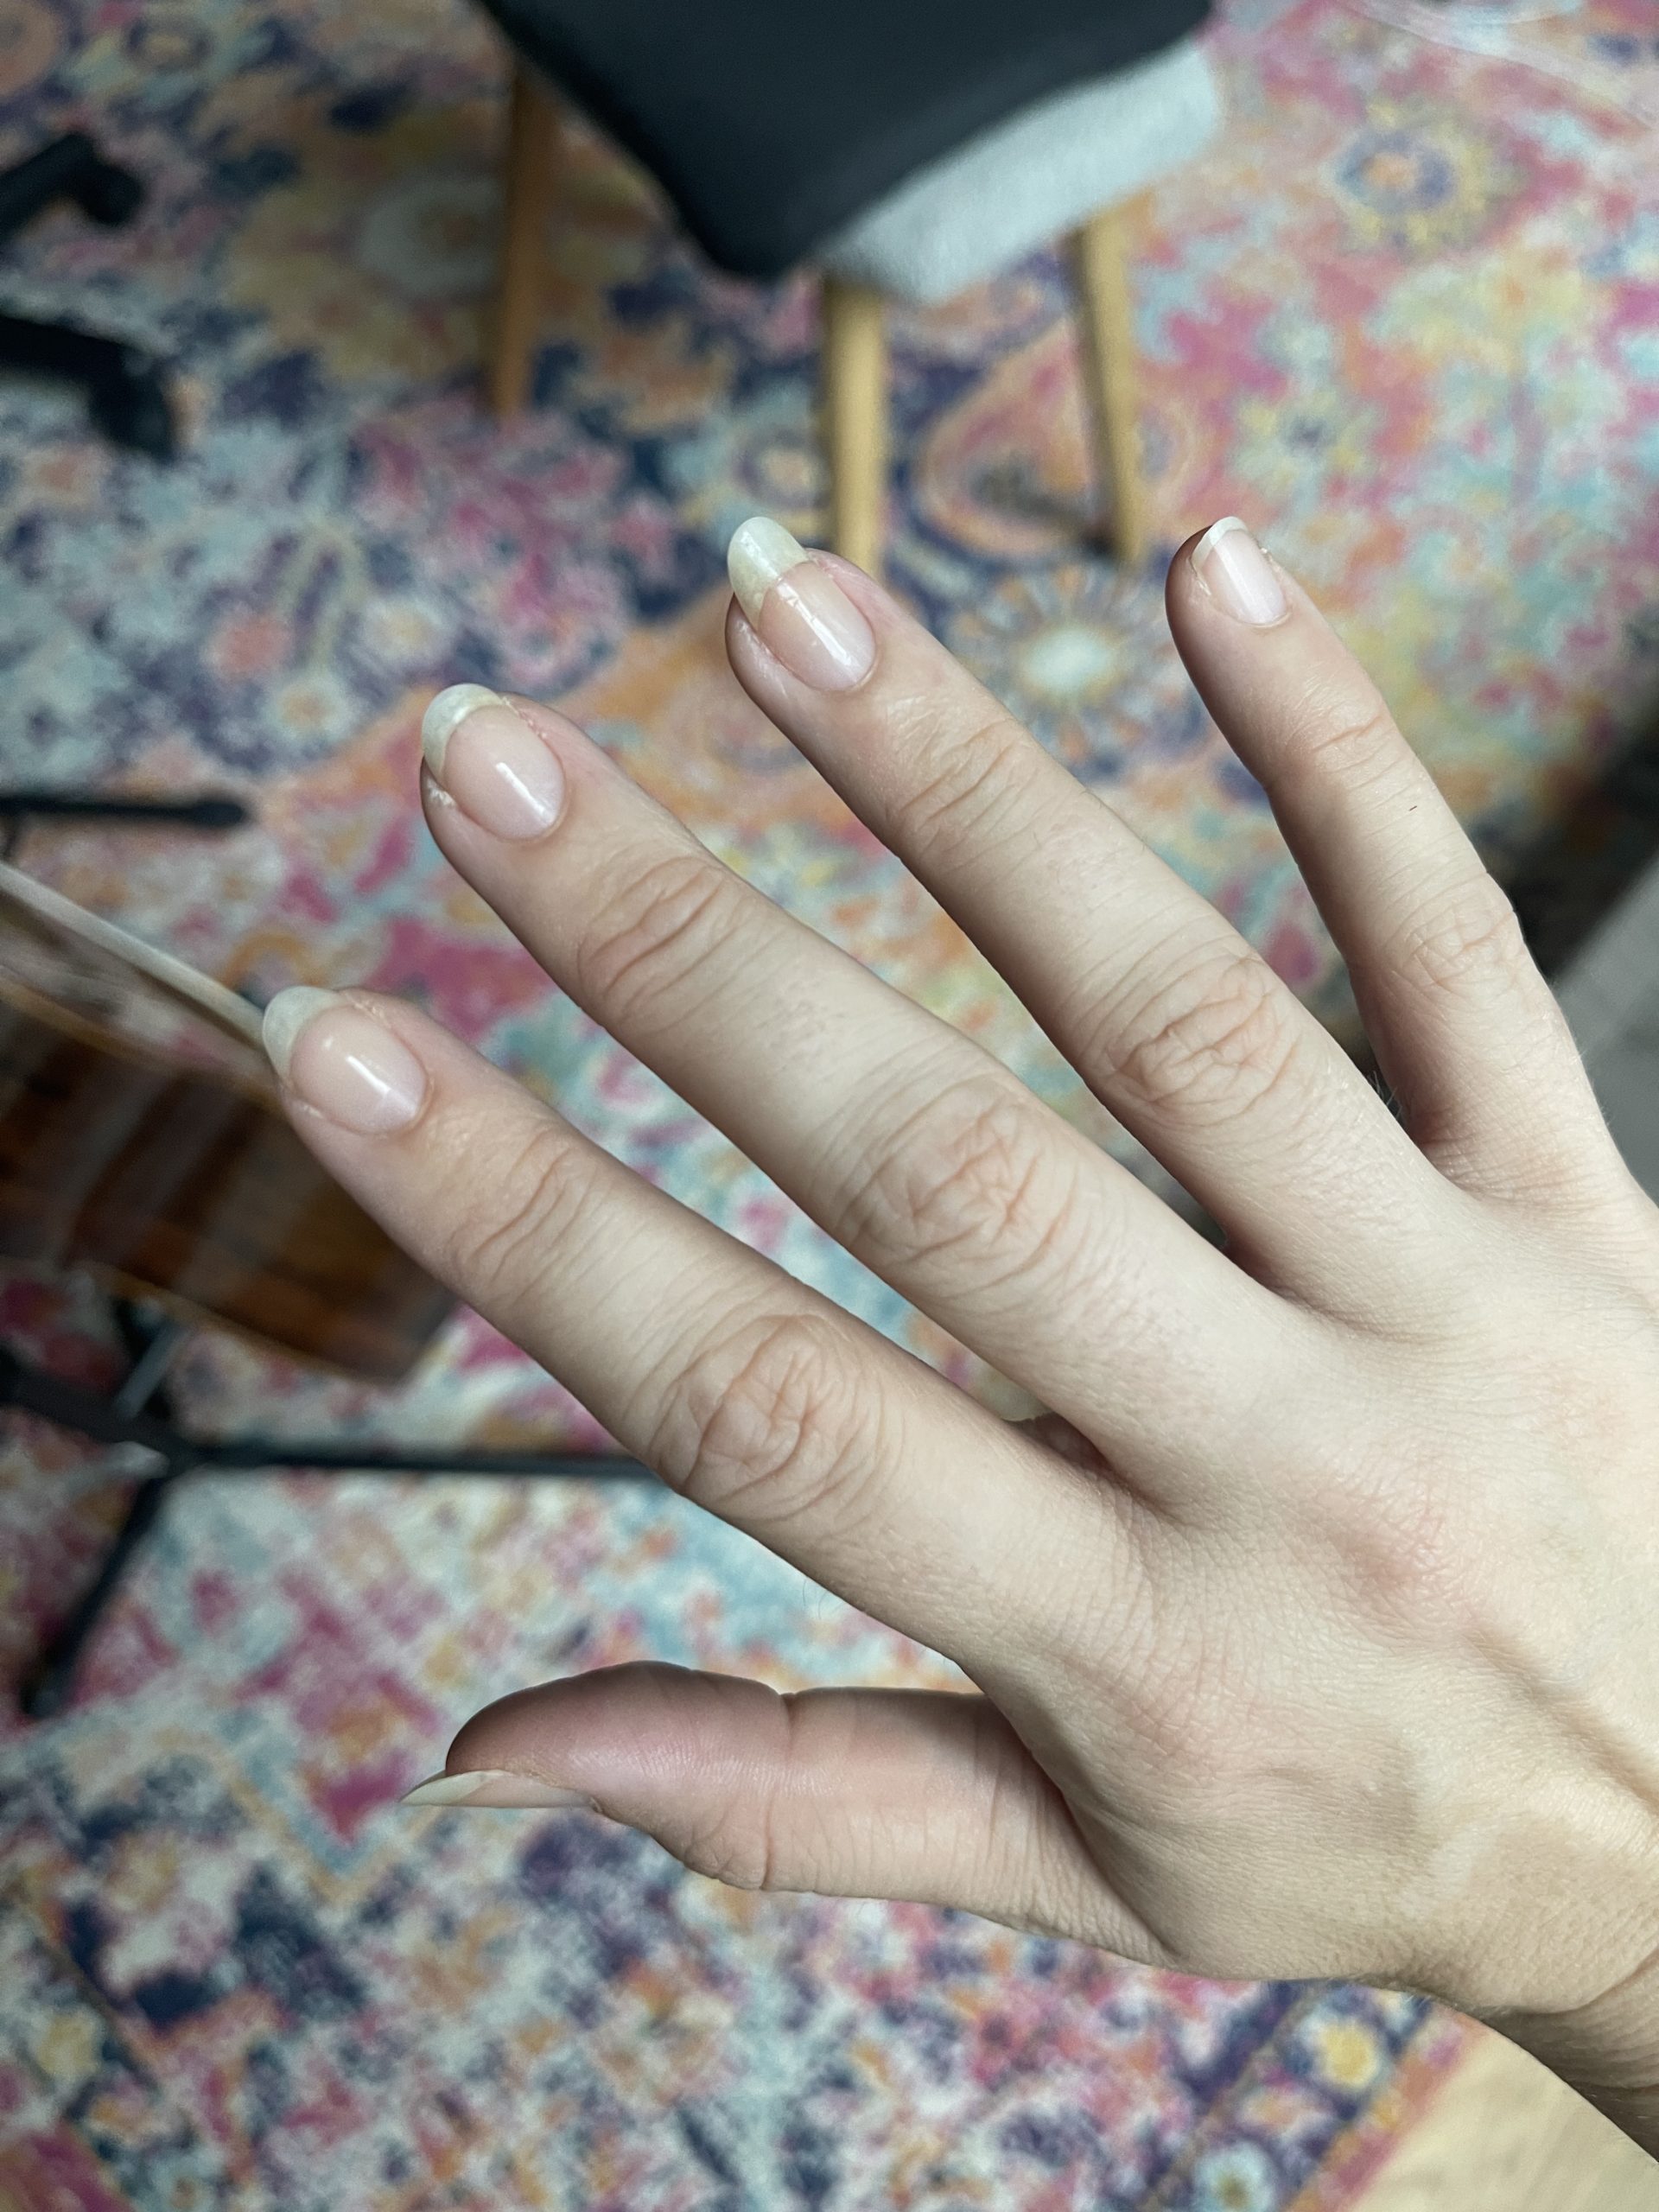
Hannah Murphy’s Nails
Check out Hannah’s YouTube Channel and Instagram!
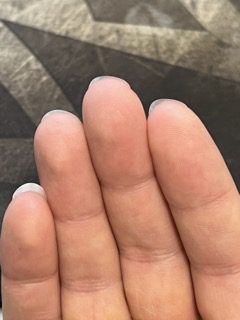
Evan Taucher’s Nails
Check out Evan’s YouTube Channel and Instagram!
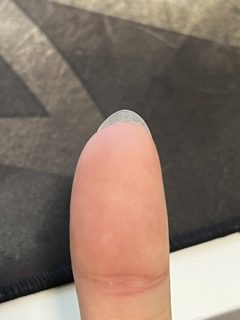
Evan Taucher’s Thumbnail
Sanja Plohl’s Nails
Check out Sanja’s YouTube Channel and Instagram!
Sanja Plohl’s Thumbnail
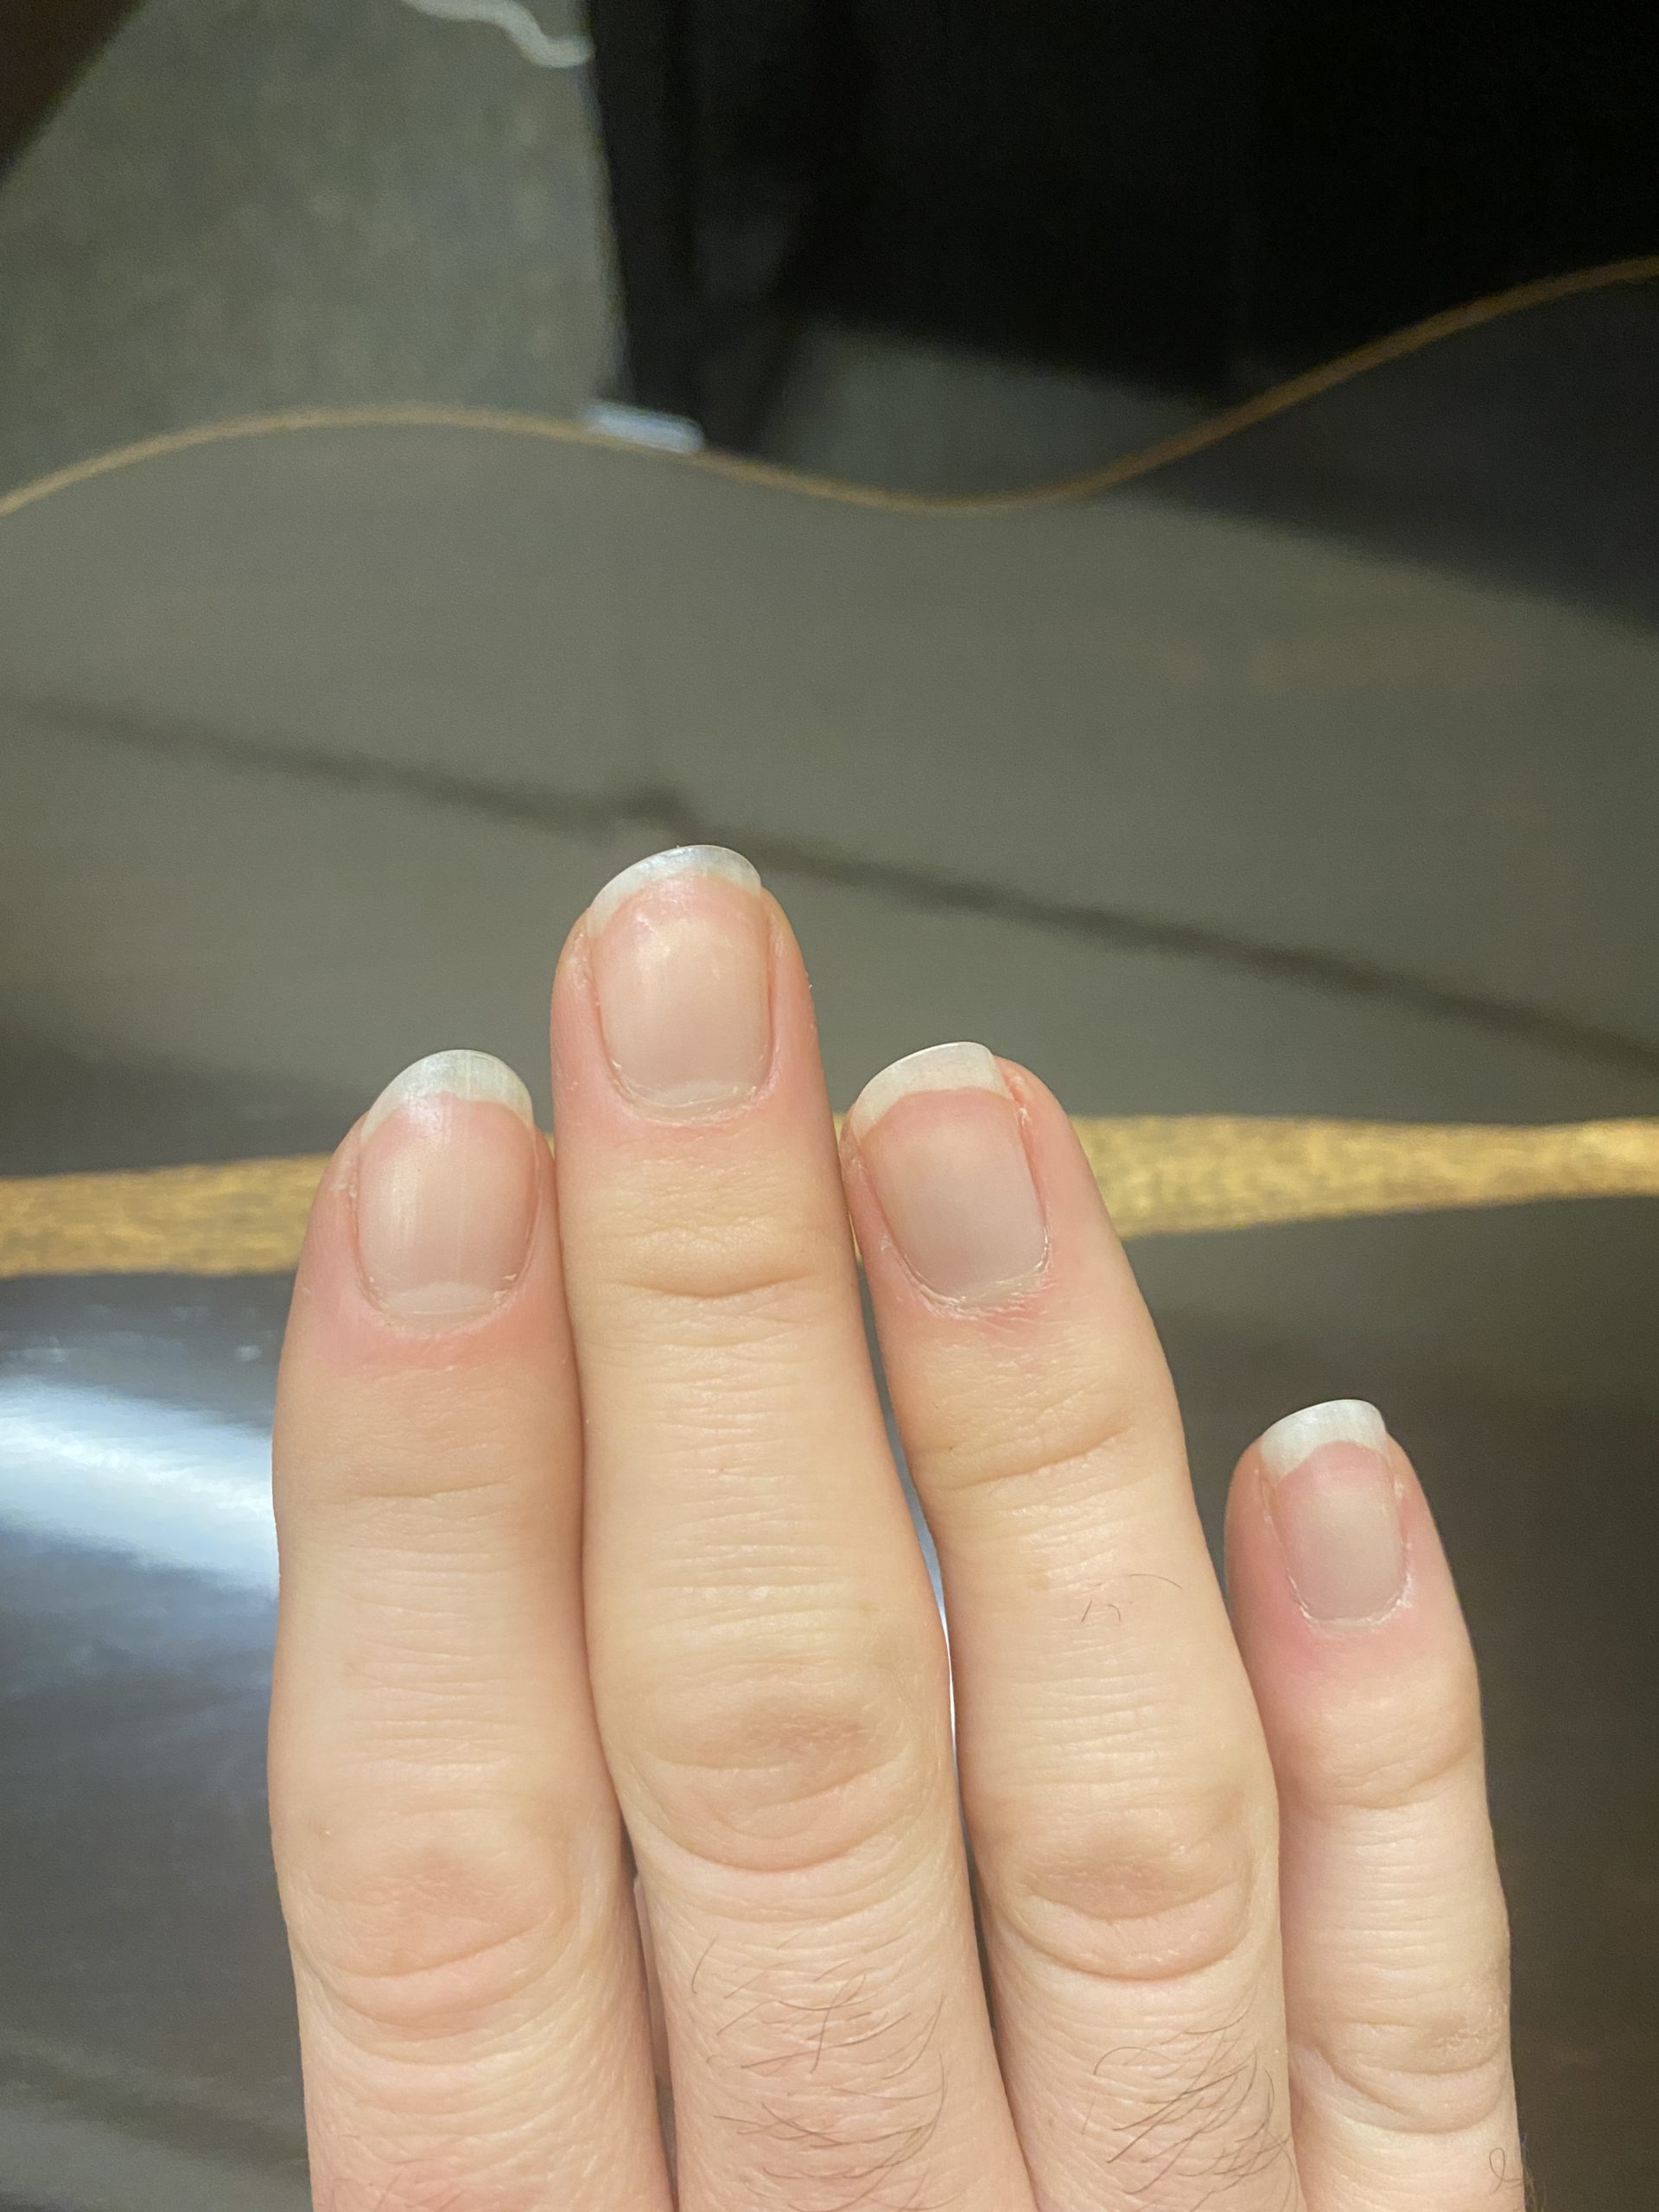
Colin Davin’s Nails
Check out Colin’s YouTube Channel and Instagram!
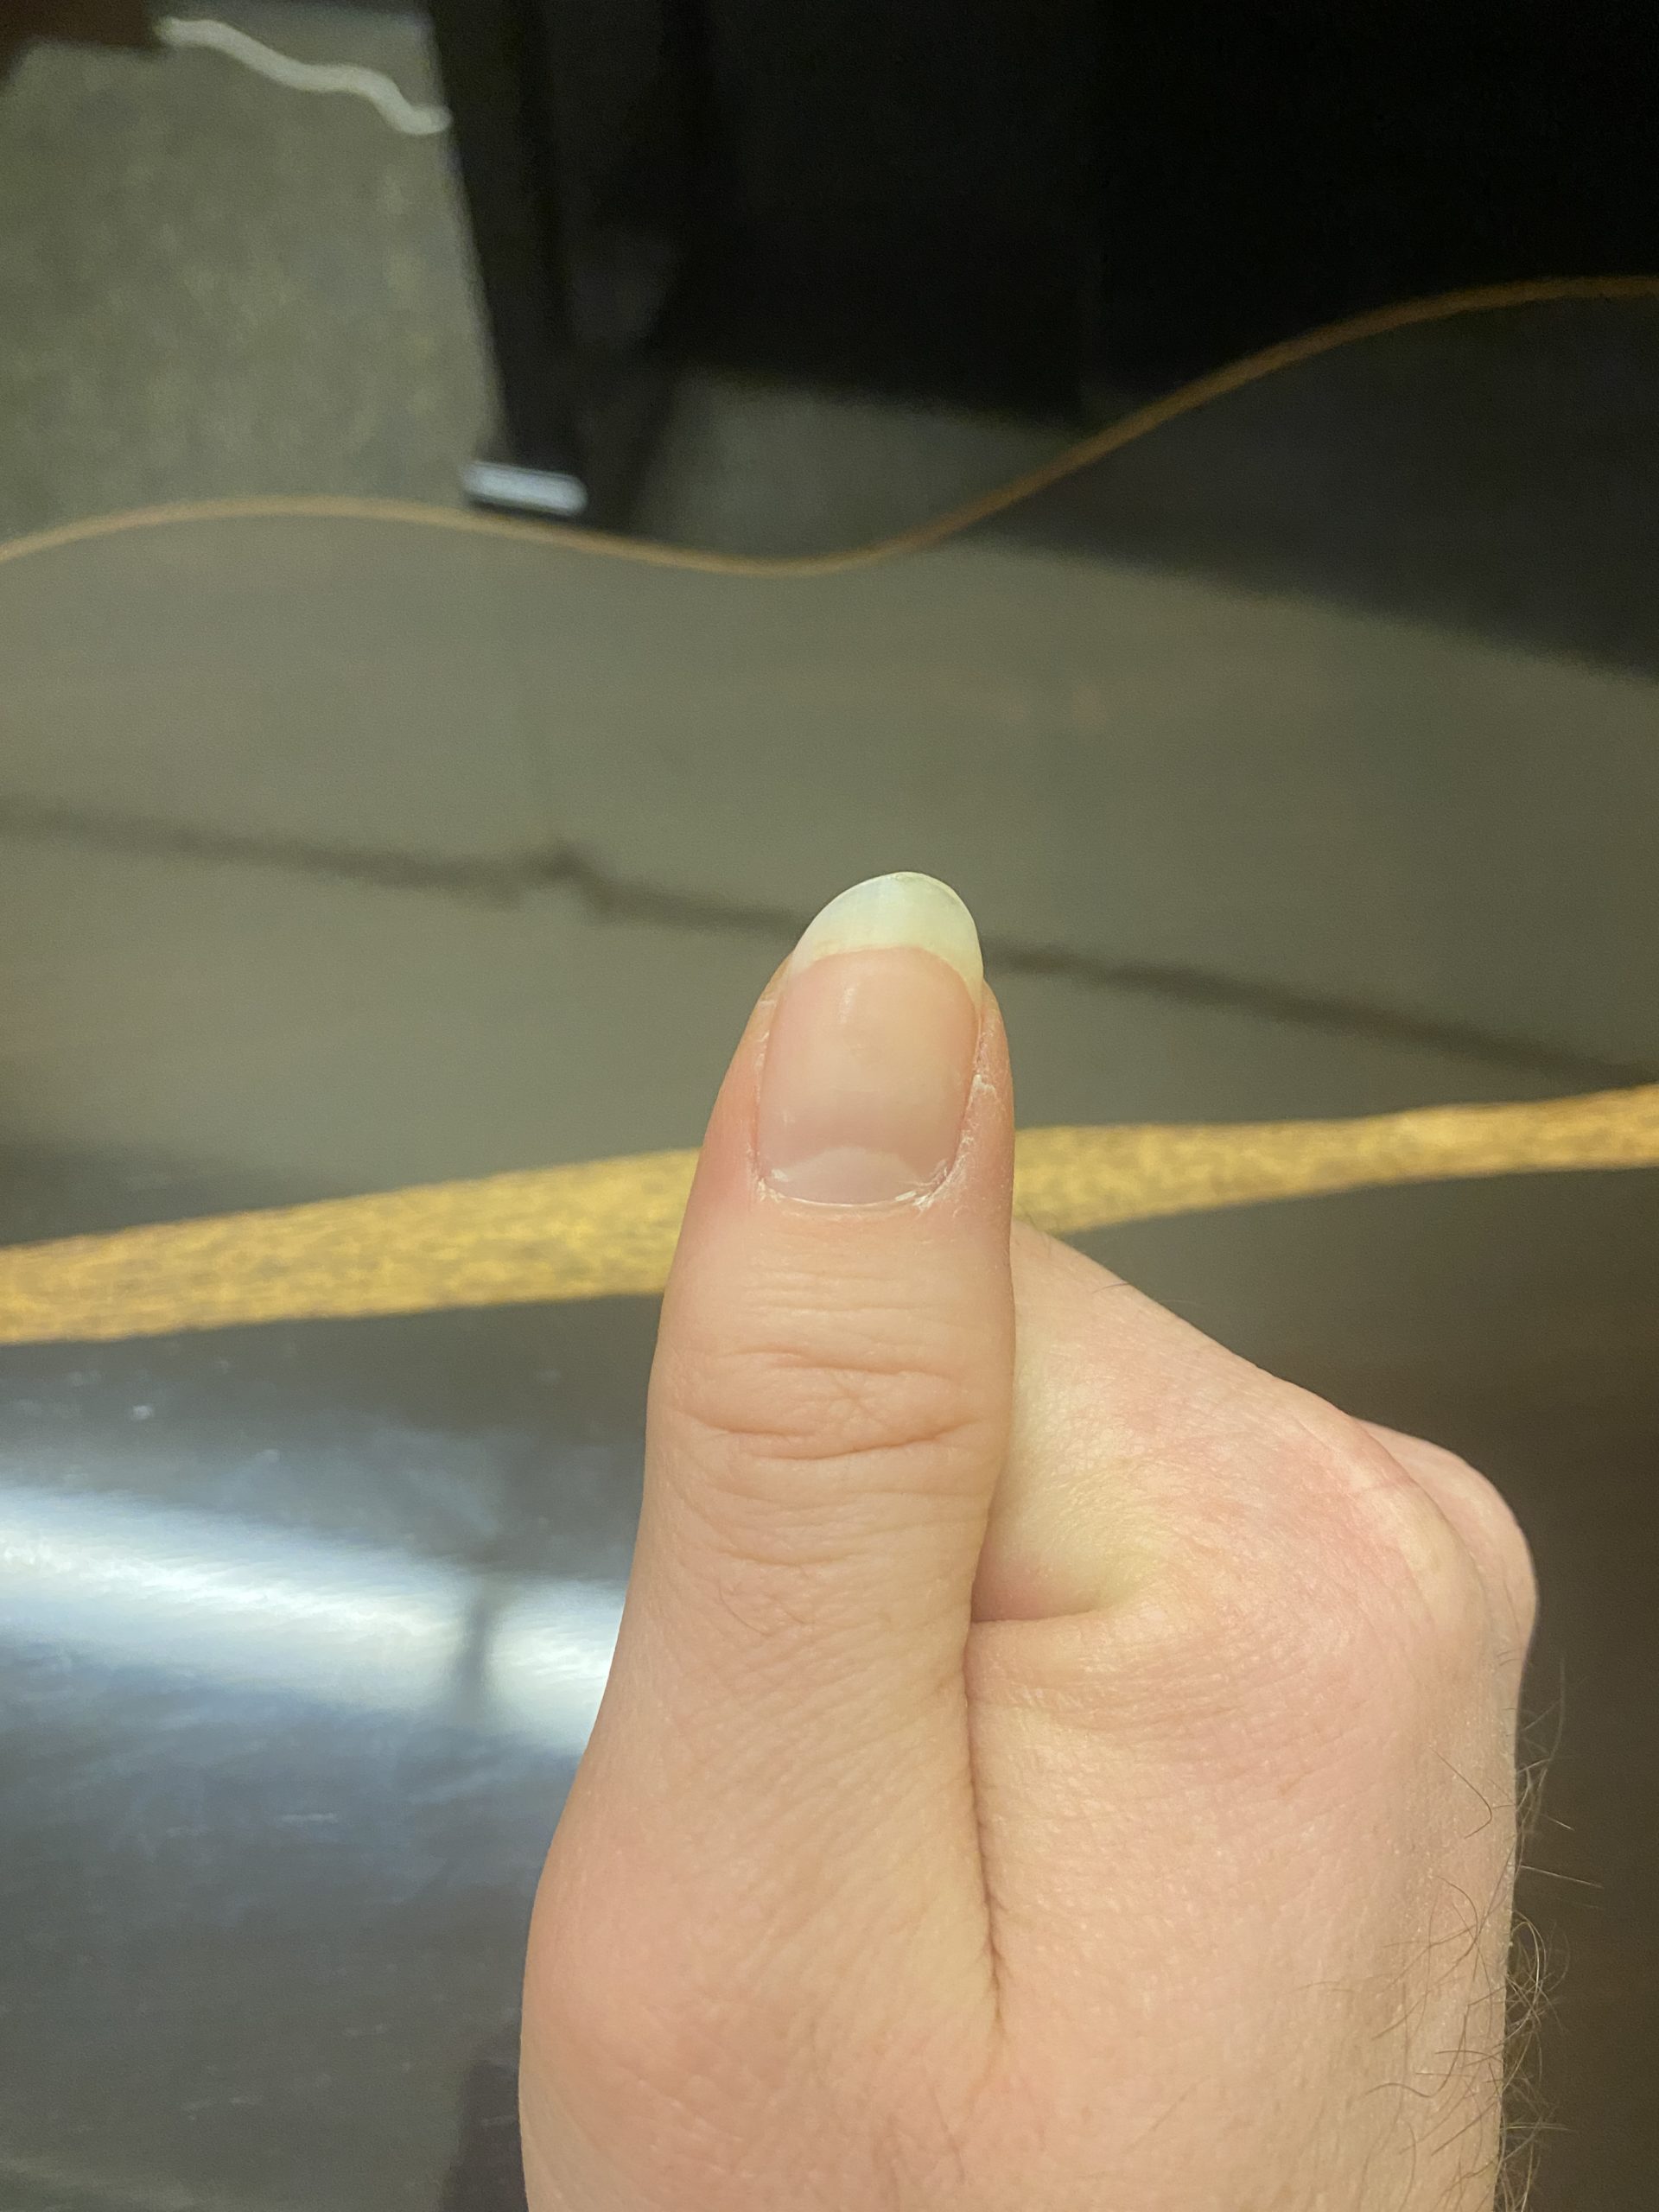
Colin Davin’s Thumbnail
***
At the link below you can download sketches of the common nail shapes we’ve gone over here so you always have them at hand (pun intended).


I’ve discovered that warming and softening my nails under warm water and then pressing them against a rounded surface, such as a pen, for a few minutes temporarily flattens out my hooked nails. Enough to get through a practice session.
Hi Gregory,
Thanks for the helpful comment! Another great solution for hooked nails similar to the spoon technique, but a little safer overall.
Peace,
Dave B (CGC team)
This is a complete and well-organized article on all nail-related aspects.
What I still miss in many treatises is HOW the right arm (for right-hand playing guitarists) leans on the guitar (rim). In many cases (for me) 1 or more muscles are pinched off, which control the fingers and thus partially prevent free play. Guitar edge supports, for example, are not always a solution. I would like to hear any comments or recommendations!
Hi Helupa,
Thanks for the comment! Because this issue has to do with the design of classical guitars (the sharp, 90-degree angle where top and sides meet), the only real solution is an armrest. I hear you that this is not always a solution, however. Something else that will help is using an arm sleeve (or long-sleeves shirt) so that your arm can be a bit more mobile and the flesh of the arm doesn’t get stuck too much.
The arm should ideally make contact with that corner (where top and sides meet) about halfway between wrist and elbow and should have some movement so you can easily cross strings. If the sharp angle is cutting off circulation to the fingers, then the arm sleeve or an armrest attached to the corner of the instrument will be best. In other cases where circulation is still fine, the arm can stay more or less fixed in that spot and the skin of the arm can move back and forth to allow the arm to move from position to position. Hope this helps.
Peace,
Dave B (CGC team)
Among my many challenges is that of topology, and when I hear about angles, I’m never sure which plane is being discussed. I have learned that for me the critical angle is the one that begins where the string does (on that bottom of my nail) and ends at the top of my nail (the one you see if you put your hand on a table and looked down at it). I try to keep this somewhere between 30 and 40°, though of course it’s a very rough estimation.
I know that we’re not supposed to “plug” products, but OPI Nail Envy has been an absolute game changer for me. It also comes in a clear matte finish, which looks great.
Thanks for the comment, Mark! Yes, I know many who swear by OPI Nail Envy for strengthening their nails.
Peace,
Dave B (CGC team)
Hello Helupa,
I use an attached arm rest which Dave describes and it has helped me immensely. These are available at http://www.stringsbymail.com.
Best,
Donna
Thank you for such a thorough blog about nails. I particularly was intrigued by the sandpaper on guitar method for discovering the best shape. I’m going to try that out!
Thank you for such an informative article. I find I like a ramp shape on my index and middle fingers and a more rounded shape on my ring finger.
Regarding repairs, I’m still looking for a non-glue method. I used many brands of glue and all I accomplished was for the glue to weaken my nails to the point where it took over a year for healthy nails to grow out. I won’t use glue again.
This article is definitely being bookmarked for future reference.
Hi Donna,
Yes, it can be very effective!
Peace,
Dave B (CGC team)
Hi Steven,
Here is a kit I’d recommend trying out that is glueless (they call it a “non-toxic bioadhesive”):
https://www.guitarnailskit.com
It’s based in Italy so you’ll have to pay for shipping, but I know a few professionals who use them (I first learned about them from Drew Henderson, Canadian guitarist, producer, and teacher).
Peace,
Dave B (CGC team)
Thanks, Dave. I’ll take a look at those for sure.
Hi Dave,
Very helpful post; many thanks for this.
Dave, when you look at my Grade 1 submission, please see if you can hear the annoying ticking sound I hear when I play. I kind of cheated by repositioning the mike so that it doesn’t pick up the ticking sound, but I do hear it when playing.
I am using a more rounded shape for my nails, keeping them rather short as the rest stroke becomes hard otherwise. My thumb’s nail is a mess right now, there is a crack that keeps propagating as the nail grows. I’ll try that nail strengthener you mentioned earlier.
Here is the look of my nails, in case anyone is interested:
https://photos.app.goo.gl/fuF7UEW4F8ED8UP26
Is this an acceptable variant? I will keep experimenting, but I am aesthetically opposed to asymmetrically shaped nails the way Scott Tennant suggest having them. It’s just a psychological barrier, but I will perhaps try it out if you think my tone is not good enough (well, for sure it could be improved). My main question is whether the tone that these nails produce is OK. I don’t really have a good baseline to compare against—your videos (you=Simon, Niki, you) are obviously much better sounding, but it’s hard to judge how I compare with your sound.
I think that the fact that I am on dialysis is affecting the nails (vitamins get washed out with the toxins during dialysis), there isn’t a lot I can do about that. I have to take special vitamin supplements that dialysis patients take but I can’t experiment with any other vitamins on my own.
For those with nail quality issues who , like me, are also allergic to nail glues, I have discovered a really effective tape which is strong and waterproof enough to provide several days playing with acrylic nails as stick on’s.
It’s Tiger Mount Tape ( not any of the other variants) and is a cheap effective solution as a 2.5m roll is about 2000 nails worth!.
Ok, it’s a bit fiddly to apply to apply to your base nail, but it gets easier with practice and is virtually instant. It gets even stronger after about24 hrs.
Available on Amazon by the roll.
Try “hard as nails”…I use it and play fingerstyle…it’s like a nail varnish..but clear..and my nails last…if I avoid damage while gardening etc
If, like me, you have very brittle nails and happen to develop an allergy to nail glue for acrylics, there is a solution worth trying.
I discovered a double sided tape called Tiger Mount Tape ( none of the other variants work) to stick on acrylics.
It’s waterproof, non allergenic ( for me) and usually lasts around 5 days or so before needing reapplication.
Works a treat!
Thanks for the helpful tip, Les!
Peace,
Dave B (CGC team)
[…] Go here to read more about using nails on classical guitar. […]
The richest most beautiful. diverse and dynamically varied classical guitar sound production is No Nails. None. Fingertips only. It was encouraged by my instructor Hector Garcia, and more so by my Study in Spain withe the eminent Maestro Emilio Pujol. It was the great Francisco Tarrega who eventually came to the conclusion that fingertips were far superior to nails. (Pujol was a disciple of Tarrega). Today, this no nail method of tone production is rarely if ever mentioned and that makes absolutely no sense. It took me a year after completely cutting my nails to begin to achieve the results, and once the the strength and development kicked in, it was truly amazing. My tone and dynamic range blossomed far beyond my expectations.
Hi Alex,
I actually do discuss using no nails in the article and give an example of a great contemporary guitarist who plays with no nails, so we are not at all ignoring that as a possibility. I even encourage folks to try it out. I’m glad that approach works for you. Best wishes.
Peace,
Dave B (CGC team)
It’s a shame that the scientific community don’t seem to offer a reliable nail strength test, would this be hardness, wear resistance, chemistry. I guess we’re all so different and convert our diets so variably it all seems very woolly.
However my story is that since I’ve been massaging Enstilar into my wife’s scalp psoriasis for at least a year my nails, previously prone to fracture and splitting, have become almost indestructible.
BTW. I’m 77 years “All those moments lost in time like ………” Discovered it too late.
Hi Howard,
Interesting! Enstilar is a steroid (has betamethasone in it) so I guess that makes good sense. Probably not a long-term solution for most, but could be a nice short-term solution in consultation with a physician. Thanks for your comment and best wishes!
Peace,
Dave B (CGC team)
I wanted to chime in on my experience w/ OPI Nails. I used it for a bit and my nails started chipping and cracking. I lost all my nails to breakage below the fingertip, whereas before I rarely had this problem. Maybe it was just coincidence, but I won’t use it again.
Thanks for your feedback on that product, Christy! At the end of the day, a lot of products you brush on your nails generally do not promote the health of the nails because of different chemicals that dry out the nail bed. Warm olive oil, as Antigoni Goni discusses, would obviously be a natural solution that works better and promotes the opposite. Thanks for your comment!
Peace,
Dave B (CGC team)
Yeah, she’s using nails in that video…
Hi Edward,
I’m afraid not, if you’re referring to Virginia Luque. She only uses a thumbnail. The sound she gets with her flesh may sound like nails, but it is not. She has just honed her tone to a very high level. She responds directly to comments in that video claiming she’s using nails and says she’s not. And I think this is a great example of why using no nails is not only an “option” but can sound absolutely beautiful on classical guitar. Luque’s sound is sublime.
Peace,
Dave B (CGC team)
My first classical teacher looked at my nails and usage in my 2nd lesson. He shook his head and handed me nail clippers. I haven’t tried nails in the decade since.
Hi Robert,
And it’s totally fine to play without nails! As mentioned in the article, there are some players who get such a beautiful sound out of the instrument and don’t use nails. Best wishes!
Peace,
Dave B (CGC team)
I am relatively lucky to have strong nails. However I also had ridges running the length of my nails. I have a friend who is a nutritionist and she advised to drink at least 2litres of water based but non caffeine based drinks, and to use a minimum of one tablespoon of high quality Tuscan olive oil daily- I buy it in Costco as it’s the cheapest.
It took just under three months for the ridges to disappear. My nails are now in great shape. Additionally, I also use coconut oil every evening as hand cream.
As for using different sand paper grades to buff the nail, there’s a nicer and better option in my opinion.
A glass nail buffer. It seals the surface of the nail with a glossy glass like finish. Of course I only use it on the edge where I file my preferred shape. I noticed that it much easier to get a good sound this way as the strings nicely ‘roll off’ as opposed to using fine sand papers.
Maybe this an option for other guitarists as it’s a kind, cheap, and speedier option to keep one’s nails in great shape
Thanks for sharing your insights and for your comment, Martine.
Peace,
Dave B (CGC team)
Solves my problem with joining Classical Guitar Corner. I have a strong objection to having long nails. When I first enquired regards joining Classical Guitars Corner I was assured playing without nails was supported. This is not the case.
Hi Eric,
I’m not sure how you arrived at this conclusion, but we do in fact discuss using no nails in the article and say that it is not only possible but that many guitarists produce beautiful tone with no nails. We have many, many members who do not play with nails. You can reach out to me by email any time and I’ll be happy to discuss with you further: [email protected]
Peace,
Dave B (CGC team)